Replacing a fuel filter on a Toyota Rav 4 practically does not differ from a similar procedure on any other car, however, as elsewhere, there are little things, points worth paying attention to. Replacing the fuel filter on a Toyota Rav 4 - instructions in the article Replacing the fuel filter on a Toyota Rav 4 practically does not differ from a similar procedure on any other car, however, as elsewhere, there are little things, points worth paying attention to. Replacing the fuel filter with a Toyota Rav 4 - instructions in the article.

The content of the article:
- Where to find the filter
- Instruments
- Replacement
The fuel filter of a car is one of the main parts of a car. Speaking about the quality of fuel at a gas station, it is very difficult to do without this part. The main purpose is to clean the fuel from all possible particles and water impurities. Let's consider how to properly replace the filter on a Toyota RAV 4 SUV.
Where is the fuel filter located and when to replace it

The main function of the fuel filter is to filter gasoline from various impurities and contaminants entering the system (be it rust, sand, metal particles, etc.). The ingress of such components can negatively affect the operation of the internal combustion engine, and lead to breakdown of various engine components.
Unlike previous models, in the 3rd generation Toyota RAV 4, the filter element is located in the gas tank inside the fuel module (which performs a kind of function of the shell in which the fuel pump is located). Such a constructive arrangement is inconvenient in that to replace the filter, you must first remove the fuel tank, then remove the module with the filter element. When performing replacement work, you should be careful and careful so as not to damage anything.
According to the regulations of the service book on carrying out maintenance, it is necessary to replace the fuel filter every 80,000 km. However, due to the fact that gasoline is not of excellent quality at gas stations, experts recommend replacing it every 40,000 km. Dealers advise to make a replacement at specialized stations, however, such work can be done by hand.
RAV 4 replacement tools and spare parts

Before starting replacement work, you need to prepare the necessary tools and materials.
Tool required to replace fuel filter on Toyota Rav 4:
- a knife to remove old glue around the gas tank cap;
- flat screwdriver and pliers.
And of course a new filter with the number 77024-42061. As for the selection of spare parts, you should give preference to the original filter, this is due to the fact that a guarantee is provided for it, and the original parts are always of the best quality.
Work on replacing the fuel filter for Toyota Rav 4

After all the necessary tools and filter are prepared, you can start replacing. The work carried out to replace the fuel filter must be performed on an inspection pit or overpass, and can be divided into 2 stages:
- dismantling work to remove the fuel tank;
- removing the fuel module, replacing the filter, as well as installation work.
Removing the fuel tank should be done in the following order:
- The first step is to relieve the pressure in the fuel system. To do this, you need to: unscrew the filler cap of the gas tank, and disconnect the "minus" terminal from the storage battery.
- The next step is to carefully remove the rear part of the exhaust system (muffler).
- If the car is four-wheel drive, then you will need to remove the propeller shaft.
- Now you need to disconnect the fuel lines and fuel hoses. In order to prevent contamination of the fuel system, the hoses must be plugged with a clean cloth;
- The next step is to unscrew the 6 bolts of the fuel tank using the head, then you can remove 3 clamps and get the gas tank. During these works, care must be taken so as not to damage the electrical supply wires of the fuel pump;
- Now you can disconnect the power supply terminals and remove the tank;
- After replacing the filter element, the tank is installed in the reverse order.

After removing the tank, you can proceed to the second stage, which looks like this:
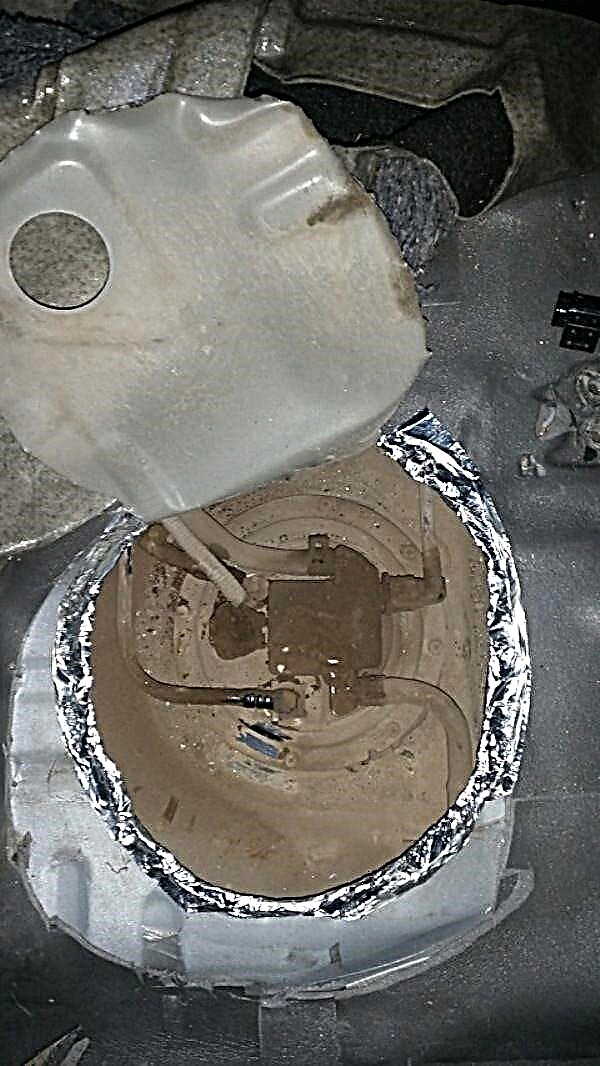
- Using a screwdriver, we pry and remove the hatch, behind which is the fuel module assembly. Before removing the module, it is necessary to remove various dirt with a vacuum cleaner so that it does not get inside the tank;
- Further, with the help of the head, the bolts of the fuel module are unscrewed, and it is easily removed.
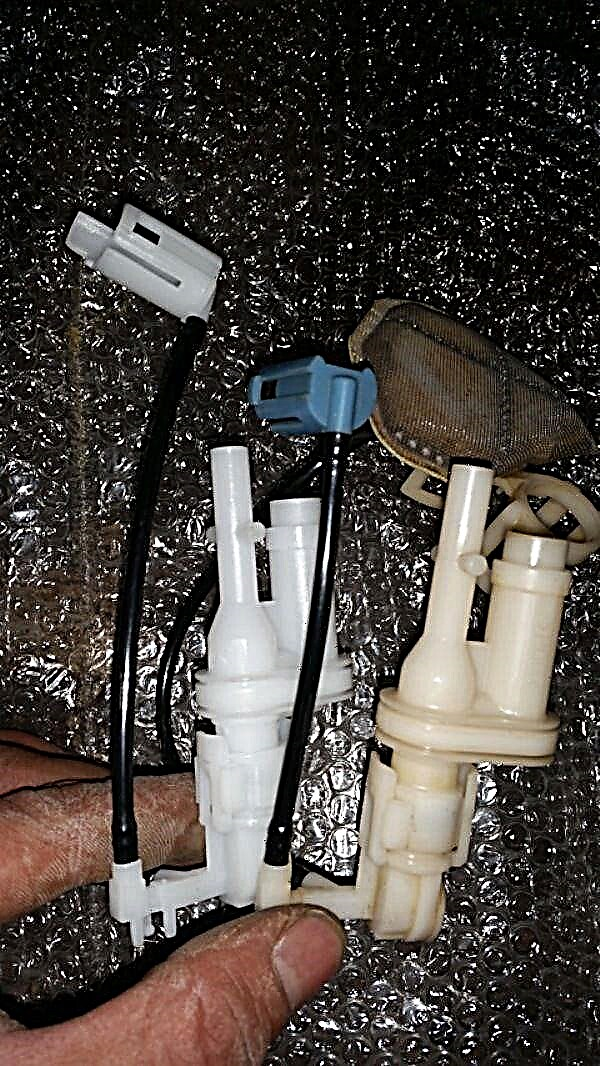
- The fuel module can be divided into several parts: a filter element, a fuel pump, a coarse fuel filter (mesh);
- Dismantling the fuel module will not be difficult, the main thing is to be careful not to damage the plastic clips.
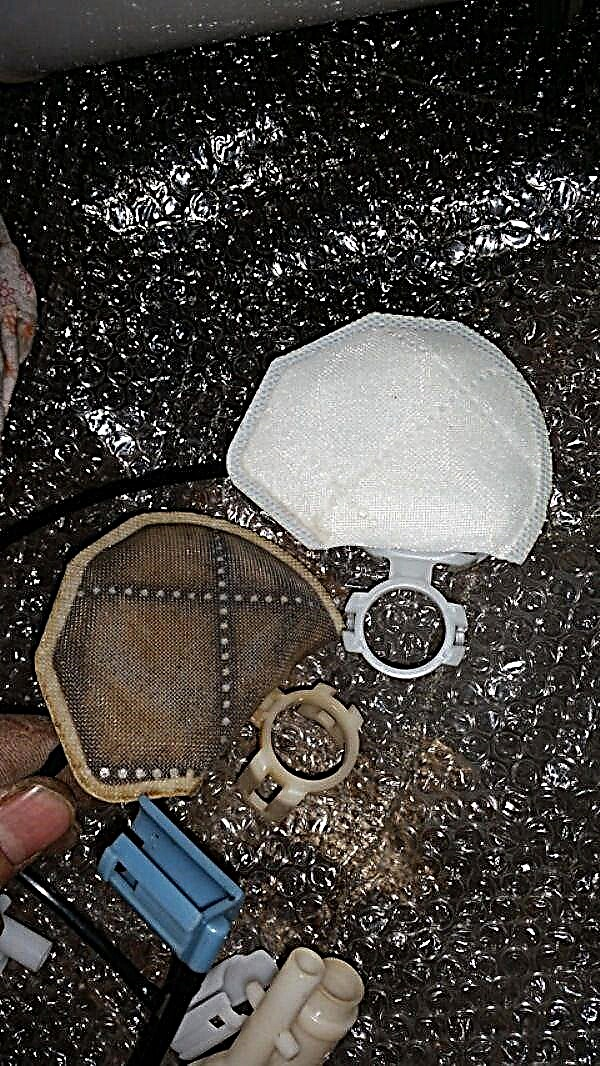
- It is also worth noting that the mesh can be washed in gasoline, but if it is heavily contaminated, then it should also be replaced;
- After installing a new fuel filter, the assembly is carried out in the reverse order.


Actually, in this way, an independent replacement of the fuel filter is performed on a Toyota RAV 4 III generation car.
Toyota